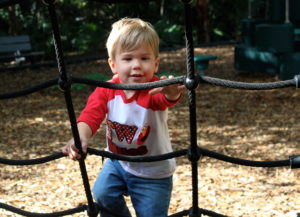
Hello, my name is Karyn, and I am addicted to taking pictures. I have always loved preserving memories with my camera, but with two (almost always) adorable children in our house, my passion has become an obsession.
Hiring a professional photographer is a wonderful way to capture those precious moments in time, but that’s a splurge we aren’t always able to fit into our budget. With two small children and only one income, photo sessions with a professional are definitely a luxury item. So how do you get those gorgeous images, worthy of displaying in your home, without mortgaging that home to pay for them? Luckily, today’s technology makes it easy for anyone to take good pictures. A little bit of forethought and planning can take your digital snaps to the next level.
Here are my tips for a successful DIY photo shoot with young children:
- Scope out possible locations ahead of time. I look at local friends’ holiday cards and social media for ideas. Outdoor settings photograph best. We have taken pictures at the beach and in several local parks. Parks with playgrounds allow me to get both nature shots and shots of the kids just being themselves, playing on the playground equipment.
- Bring an assistant. Having an extra person with you is invaluable. His or her main job is to get the children to look at the camera. Choose someone willing to make silly faces, sing songs, and blow bubbles. This is a great job for a teen or tween if an extra adult is hard to come by.
- Give kids props to play with. Your pictures will look less staged if you have a prop for the kids to play with. For our Christmas photos, we brought a small tree and some shatter-proof ornaments to a local park and let our twins decorate it. This helped break the ice and I was able to take some posed photos later with fewer fake smiles. Wagons, balloons, bubbles, or favorite small toys also look good in pictures.
- Take LOTS of pictures. Digital cameras are an amazing invention. Really, it is a wonder there are any decent pictures of those of us born in the 70’s or 80’s! On our last photo shoot, I took 400 photos in less than an hour. I ended up with about 20 keepers.
- Choose the time of day wisely. You know when your children are at their best. Avoid times when they are likely to be tired or hungry, and have snacks and/or a small treat ready for as soon as you are done.
- Use photo editing software. Take an evening to familiarize yourself with your computer’s photo software or even the editing tools on your phone. Sometimes just “enhancing” the photo makes a world of difference. Most software can remove red eye or adjust the angle of the photo if it isn’t straight. Confession – My son had a huge scratch on his face the day we had planned to do our three-year photo shoot. I knew it would be hard for us to reschedule, so I decided to just go ahead. Later, I was able to magically erase the scratch using iPhoto’s editing tools.
What do you have to lose? Use a digital camera, your phone, or borrow a digital SLR from a friend and plan your own photo session. Hopefully, you will capture a few memories without breaking the bank!
Let’s connect on social media, too:
Mumbling Mommy on Facebook
Mumbling Mommy on Twitter
Mumbling Mommy on Pinterest
Category: Kids
Tags: Karyn


