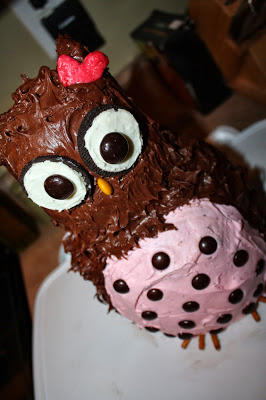
Birthday parties are one of my favorite things to do for my children. I get so excited and start planning months in advance. Of course thanks to Pinterest and Etsy it has become so much easier. I really enjoy every aspect of planning a birthday theme for my daughters and son, and trying to find decorations to match it. I’ve planned 8 birthday parties in 5 years and this owl cake has always been one of my favorites.
I love to make my children’s cakes and it is a great way to save money on birthday parties, but look like you spent a lot. I’ll admit I have made cupcakes a few times instead of cakes, but I try to jazz up the frosting and add a cupcake topper for fun.
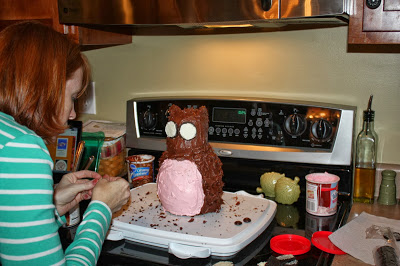
One of my favorite birthday parties I did was for my daughter, Tenley. For her first birthday we did an owl theme. I couldn’t find a cute owl cake mold to match my decorations, but after Google searches and Pinterest I was able to track down a creative adorable owl cake to make. Below are step by step directions and the recipe I used if you want to create your owl cake!
The owl cake I made is a vertical cake. It wasn’t as hard as I thought it would be and was the hit of the party. The instructions for making your own owl cake can be found below or on Parenting.com where there is also a diagram. Enjoy!
This owl cake serves 12
Owl Cake Directions
Ingredients:
- 2 cakes baked in 1-quart Pyrex bowls (My trick is to use cake mix with pudding in it. I also add 1/3 cup of mayo to make it extra moist)
- 2 cakes baked in (12 oz) ovenproof glass bowl
- 2 Oreo cookies
- 5 banana Runts (or some type of candy you can find to make the beak
- 1 can (16 oz) chocolate frosting
- 1 cup vanilla frosting (I used pink frosting to make it girly)
- 2 tablespoons mini-chocolate chips
- 2 Junior Mints
What you’ll need:
· A serving platter
· A chopstick or wooden dowel
· A resealable sandwich-size plastic bag (Ziploc)
Trimming the cakes:
1. Trim the top side of all of the bowl cakes to make level.
2. Trim ½ inch from the curved bottom of one (1-quart) cake and place it wide side up on a serving platter. Spread the top of the cake with some of the chocolate frosting. Place the other quart cake on top, flat side down to make a ball.
3. Repeat the trimming and assembling process with the 2 (12 oz) bowl cakes.
4. Spread some frosting on the top of the larger ball and place the smaller ball cake on top as the head. Insert a chopstick or wooden dowel in the center to help balance the cakes (see template).
Frosting the cake:
1. Spoon 1 Tbsp of the vanilla frosting into a resealable plastic bag (or if you have frosting bags use those).
2. Spread the remaining vanilla frosting (or any color you decide to make it) on the front of the larger ball cake for the owl’s chest. Make smooth. Dot the chest with the mini-chocolate chips as seen in photo.
3. Separate the Oreo cookies, leaving the cream on one side of 2 cookies for the eyes.
4. Cut one of the cream-free Oreo cookies in half with a serrated knife to make the ears. Press the cut cookies into the top of the cake for the ears.
5. Spread the remaining chocolate frosting over the top, sides and cookie ears. Make the head area smooth. Using the back of a spoon, lightly press against the chocolate frosting and pull to make feather-like peaks all over the body of the owl.
To complete the decoration:
1. Snip a small corner from the bag with the vanilla frosting. Pipe a dot of frosting on the head area and attach the cookies with cream for the eyes. Pipe a dot of vanilla frosting on the cookies and add the mints as the pupils.
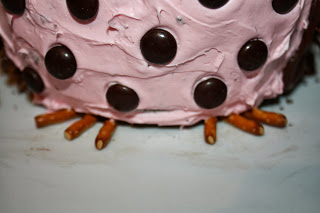
2. Insert one banana Runt below the eyes for the owl’s beak. Insert the remaining banana Runts into the bottom of the white chest area for the owl’s feet.
Note: I used pretzels for the feet instead and I also took a Starburst candy and broke into pieces to make a bow above one ear.
My kids loved this owl cake. It was such a hit and everyone loved it. I was nervous about it falling but it was quite stable. I hope you enjoy your cake as much as we did!
For more Frugal Friday ideas, check out the entire series on Money Saving Mom or Simply Rebekah.
Let’s connect on social media too:
Mumbling Mommy on Facebook
Mumbling Mommy on Twitter
Mumbling Mommy on Pinterest
Category: RecipesTags: Alyssa


