


Like fellow blogger Heather, I love coconut oil. I discovered it over a year ago when I came across a recipe for a simple DIY sugar scrub. I was looking for easy, inexpensive teacher gifts, and these were a big hit. I had leftovers that I started using myself, and my love affair with all things coconut oil and natural products began.
I have very dry, highly reactive (i.e. sensitive) skin, and most beauty products on the market dry me up, break me out, give me eczema, or all three at the same time! A good rule of thumb for me is, “If it smells good or promises miracles, then I’ll wake up with a rash.” It’s true that some products work well to get rid of whiteheads or blackheads or any other skin irritant – for most people. I’m generally an exception, though.
So when I find something that works well and doesn’t irritate, I stick with it. If they’re natural products, then that’s all the better. And if it’s inexpensive, I’m sold for life. Coconut oil is all of these, and you can eat it, too. What other moisturizer doubles as a stir-fry oil?
Several months ago, I traded my expensive and marginally effective night moisturizer for plain coconut oil. The results have been fantastic: my skin is much less dry, heals more quickly, and my eyes are smoother and less puffy. (See why I’ve become obsessed?) This led me to wonder what else I could swap out for more natural products, and what other DIY beauty treatments actually work. I’m still experimenting, but this article tells you what I’ve learned so far.
Natural Products
 |
Coconut Oil
Coconut oil comes in two types: refined and unrefined. Refined has a smoother texture and no scent. Unrefined is a little thicker and has a very pleasant, light coconut scent. Many sites promote unrefined oil as “better” than refined oil, but I haven’t noticed a lot of difference between the two when used topically. I prefer unrefined because I like the texture and scent. But if you have an aversion to the smell of coconut, then feel free to use refined oil.
The great thing about coconut oil is its versatility. You can use it as a moisturizer, makeup remover, conditioner, shaving cream, anti-frizz treatment, lotion, and in over 150 other ways. Every time my kids have a minor skin irritation—from dry winter skin to a scrape that is healing but itchy—we break out the coconut oil. My kids inherited my sensitive skin, and many “calming” or “sensitive” lotions and treatments actually irritate their skin. Coconut oil works much better for them, too, and has never irritated their skin.
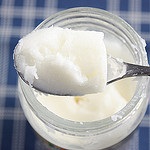
Why whip?
You don’t have to whip coconut oil, but it’s easy and fun to do. Whipping it incorporates air and softens the oil. This helps you stretch your coconut oil dollar, and whipped oil is easier to get out of the jar and use than non-whipped oil. It also just looks pretty.
Recipe: Brightening Moisturizer
While plain coconut oil is a great moisturizer, I also wanted something that would help even my tone and brighten it, too. I looked at a lot of recipes online, and many of them involved expensive or difficult-to-find ingredients. And I wanted to keep this simple in case something irritated my skin—the more ingredients I used, the harder it would be to find the one that wasn’t working for me. So I developed this simple DIY moisturizer that also includes lemon essential oil (for brightening) and Vitamin E (for general skin health).
If you make this with unrefined coconut oil, then it smells exactly like lemon cake. Yummy! You can add other oils to customize it, if desired, or beeswax to help keep it from turning back to liquid.
- 1/3 cup Unrefined Coconut Oil
- 10 Drops Lemon Essential Oil
- 1 tsp Vitamin E oil
With a stand or hand-held mixer, whip coconut oil until it resembles whipped cream. Add the lemon and vitamin E oils; continue to whip until well-incorporated. Store in an air-tight container. Warning: this will melt back into a liquid in a warm environment. It still works, but if you want to keep the “firm” texture, then store someplace cool (but not “refrigerator cold,” or it will harden completely).
Castile Soap
 |
One of my sons and I have especially sensitive hands, and most hand soaps on the market will break us out in eczema, especially in winter. I had been buying expensive “all natural” foaming hand soap for months because everything else irritated our skin. I like liquid soaps because they keep the sink cleaner, and I like “foaming” soaps because you can use less soap to wash your hands—good when you have kids that will pump non-foaming soap several times, thinking they need a large amount to get their hands clean.
I read that castile soap was gentle and foamed well and could make an effective but gentle hand soap. So I was eager to try it out. (Note: peppermint castile soap is the easiest one to find, but avoid it if you have sensitive skin. Natural peppermint can “burn” on broken skin or rashes. I buy the lavender instead; it also comes unscented.)
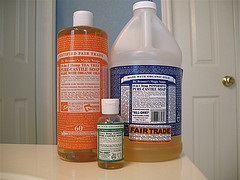
Castile soap comes in two forms: solid bar and liquid. The biggest difference—besides the obvious—is price. In my local stores, the bars run about $4 each, but a 16 oz. bottle of liquid is priced at $17 (prices vary by store and region.) The liquid soap is concentrated, so you must dilute it before you use it.
I wasn’t sure if I’d like castile soap, so I bought the bar instead of the liquid. (Recently I’ve noticed travel-sized bottles at Whole Foods, so finding those would be a better way to try the liquid.) I read online that I could melt the bar soap into water and make my own liquid soap. That sounded ideal, so I bought a bar, grated it up, and melted it into a half-filled stockpot. I filled up my favorite foaming hand soap bottles, and it worked beautifully—for an hour. Then the soap cooled and hardened into a texture that is exactly the consistency of wet snot. And this thicker form clogged up my soap dispensers so badly I had to soak them in hot water to get it out.
The moral of the story: if you want liquid soap, just buy liquid soap.
Although it didn’t work as hand soap, I put the “snotty” soap in jars and use it the shower. It foams up on a poof very easily, and it’s a great body wash and shaving cream.
Recipe: DIY Foaming Hand Wash:
- Use or reuse a foaming hand soap dispenser.
- Fill it most of the way with water.
- Add 1-2 capfuls of liquid castile soap. (Adding the soap AFTER you fill it with water keeps it from foaming while you’re filling it.)
- Gently stir with the dispenser “straw” to mix.
What else can I do with castile soap?
The bottle of Dr. Bronner’s castile soap famously advertises that you can use it in at least 18 ways. Of these, I’ve tried it as a hand wash, face soap, body soap, shampoo, bathroom/counter top/floor cleaner, and (hand wash only) dish soap. I don’t want to use it in my HE washing machine or brush my teeth with it, so I won’t be trying all 18 uses.
Face Wash: This has become my favorite go-to face wash. I just use the same dilution that I use for hand soap, so this means that each day I wash my face with the exact same bottle I use to wash my hands. I’ve never had a problem with irritation or break-outs, and my skin feels cleaner than it does with the super-gentle face washes I used to use.
Body Wash: Likewise, what is good for my face and hands is good for my body, too.
Shampoo: This is tricky. I tried it alone, just to see what would happen, and at first, it was great. My hair needed less “anti-frizz” product than usual, and my wavy-to-curly hair was curly and soft. But after a couple of days, my hair started to feel very greasy because the PH balance was off. I looked for Dr. Bronner’s hair rinse in a few local stores, and no one sold it. The other alternative was to use apple cider vinegar, but I did not want to smell like salad. I went back to my normal shampoo/conditioner combo, but every once in a while I’ll use the castile soap as a “2 in 1” when I’m in a hurry.
Household Cleaner: I have a spray bottle filled with water and two capfuls of lavender castile soap that I use in the kitchen and bathrooms. I especially love using this in my bathroom: I can clean everything with it, from the mirrors to the toilet, shower, and floor; it cleans up soap scum and worse; and it smells so clean and natural. It really neutralizes odors without covering them up with a cheap perfume-y scent.
(Hand-washing) Dish Soap: I have mixed feelings about using this natural product on dishes. I tried the recommended dilution, but it was so watery, I didn’t think it was really getting the dishes clean. To get a nice foaming action, I had to dilute 4:1, and at that point, I wasn’t saving any money. So this is a great natural dish soap if you’re willing to go through the bottle quickly.
Final Verdict: Since you always dilute liquid castile soap, the big bottle is worth it and will last you several months or more (unless you’re washing your dishes with it).
Essential Oils
Lemon Oil: If you only buy 1 essential oil, this is the one to buy. It can brighten your skin and help clean your house.I love the clean, natural scent, and it pairs well with my lavender castile soap and my favorite aromatherapy scent, jasmine.
Aromatherapy oils: One of the benefits to making your own natural products is that you get to control the smell. Also, I’ve found that natural scents from essential oils don’t irritate my skin like “chemical” smells do. I love jasmine essential oil and add it to lotions and body washes.
Rosehip oil: This is another “miracle oil” that is supposed to improve your skin naturally. I’ve just recently started using it on old scars, so I haven’t had it long enough to see them fade. I have noticed a nice improvement in texture, however, so I’ll keep it up.
Tea Tree Oil: This is a popular oil if you need something more astringent for breakouts or similar problems. I’m not crazy about the smell (reminds me of menthol), but this natural product does soothe breakouts and razor burn.
Avoid peppermint oil if you have very sensitive skin. Although it smells wonderful, it’s too harsh for skin that is broken out into a rash or is otherwise sensitive. If you want a similarly clean, astringent smell, use lavender instead.
A Word of Caution for this Natural Product
Not every homemade natural product is necessarily better. Homemade sunscreens are notoriously unreliable and can make you more likely to burn. With my fair skin and family history of skin cancer, I won’t try it.
I also used to use homemade dishwasher soap and homemade laundry soap. However, the vinegar and baking soda were too harsh on my dishwasher and actually corroded the dispenser. And homemade laundry soap is not good for HE washing machines.
So do your research before embarking on homemade beauty and cleaning natural products, especially where health or safety is involved.
What are your favorite DIY natural products? What works for you?
Let’s connect on social media:
Mumbling Mommy on Facebook
Mumbling Mommy on Instagram
Mumbling Mommy on Pinterest
Mumbling Mommy on Twitter
Tags: castile soap
